Adding plugins to a page
So the time has come to start adding content, or plugins, to your page. If you haven't got a page to drop plugins onto, then read our Page Management documentation.
These are general plugins for adding any plugin to a page. If you want information about configuring a specific plugin, then you'll need to head over to our Plugins page and view the documentation for that plugin.
Here we will just be adding, editing and deleting a standard text plugin from either the New Plugins or Plugins Tab.
Adding a Plugin
Step 1 - Choosing a plugin
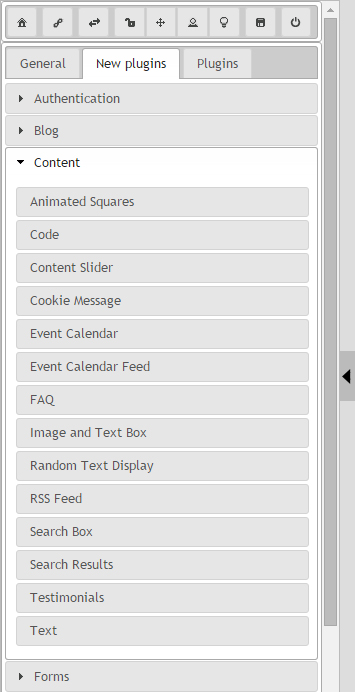
Ok, so first thing that we need to do is find the plugin we want to add. For this demo, we are going to be adding a new Text Plugin. So we head over to the Admin Panel on the left hand side, and select the New Plugins tab.
New plugins are separated into Groups, and the Text Plugin that we are after is under the Content group. So select that group to display the Plugins.

Step 2 - Dropping it on a page
So from the Admin Panel, select the plugin and drag it over the page with your mouse. You'll notice as you do, that plugin will transform into a Yellow Box. You'll also notice that the places in which you can drop a plugin on your page will have been highlighted with a green dashed border, displaying all available areas.
While still dragging the plugin, drag it around the page until the yellow box appears in the position you want it to display. Within plugin areas, you may also have other plugins, in which you can drag the new plugin either above or below the existing plugin, changing the display order.
When you are happy with the position of your new plugin, drop it onto the page.
Step 3 - Naming your plugin
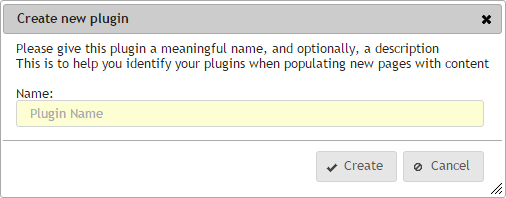
Once your plugin has been placed on the page, you'll be presented with a dialog asking you to name your plugin. If you press the cancel plugin, the new plugin will be cancelled and will not be placed onto the page.

When entering a name, be descriptive. If you are placing a logo in the top left of the page, and it'll appear on every page, call it something like "Main header logo". If you are placing a text plugin on the main area of a service page, name it after service and content, for example "Roofing services main text".
These names will appear under the Plugins tab in the Admin Panel, and if descriptive and well thought out, it will make it easier to find when you have lots of plugins.
Once you are happy with your name, click save. You'll then be presented with a new dialog allowing you to change the settings of that particular plugin. Click save on that dialog once you are happy with the settings.
Edit a plugin
To edit a plugin, hover over that particular plugin on the page. You'll notice that it will be given a grey dashed border around the plugin container. You will also notice a couple of buttons appear providing you have the Show Hover Buttons toggled on. You will be presented with a Edit button in the top right of that plugin which will have a pencil icon.

Click the edit button to bring up that plugins edit dialog.
You can also double click on that plugin (providing you are not clicking on a link within that plugin) to also bring up the edit dialog.
Delete a plugin
To delete a plugin, hover over that particular plugin on the page. You'll notice that it will be given a grey dashed border around the plugin container. You will also notice a couple of buttons appear providing you have the Show Hover Buttons toggled on. You will be presented with a Delete button in the top right of that plugin which will have a trash can icon.
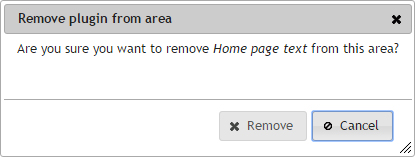
Clicking on this delete button will prompt you to confirm that you want to delete this plugin.

Using this method will only delete the selected plugin from this particular page, and that the plugin will still be available under the Plugins Tab on the Admin Panel.
Move a plugin
To move a plugin, simple move the mouse over the selected plugin until the hover status displays, showing the container of the plugin within a grey dashed border, and the edit and delete buttons in the top right. Them simply click and hold the left mouse button to start the drag option, and move the mouse over to the new desired position within the page. The plugin will disappear from the page and be replaced with the same yellow box that appears when dropping new plugins onto a page. Once the yellow box appears in the new desired location, release the left mouse button and the plugin will be placed. All movement is instant and requires no further action.
Show you have issues with moving plugins, or the plugin has an inner drag option, like the Map Plugin for example, then you will need to toggle the Sortable Option within the Admin Panel Toolbar to display a new button next to the Edit Button, which will allow you to grab that and drag the plugin as an alternative.
